
 A program of Community Synergy
This month at a glance
Prepare Your Beds
Choose a sunny location and build your beds or clear out last season's beds. Feed your soil with compost.
Direct-Sow
leafy greens, root crops, peas, garlic and onion sets, and annual cool season flowers.
Transplant from starts
Brassicas, Celery, Rhubarb, Perennial native shrubs and flowers.
Frost watch
Have frost cloth and hoops ready for late October into the first week of November first frost.
Harvest summer crops and save your seeds.
Our Philosophy: Rooted in the Forefront
You might wonder why we focus on the "front yard." It represents a change in perspective. Whether your physical garden grows in the front yard, the backyard, or a few pots on a balcony, what truly matters is that gardening remains a priority at the forefront of our hearts and minds. Community Synergy’s Food and Growing Guild hopes to help your garden THRIVE this year with an abundance of healthy food. Our goal is to help Cochise County residents grow more food successfully. We hope you will feel proud of your future harvests and have the ability to share the abundance with new friends and neighbors.Welcome aboard, and let's grow something beautiful together!
Program Perks & Monthly Resources 🎁
As a participant in the Community Synergy Front Yard Garden Program, you will receive dedicated resources and community support to help your garden thrive. When you signed up, you gained access to these exciting benefits:
- Monthly Cochise County Garden Guide: A comprehensive newsletter delivered straight to your inbox at the start of every month. Customized specifically for our high-desert climate. It includes timely lists for sowing and transplanting, actionable maintenance checklists, seasonal recipes, and a Community Corner to share your personal photos and lessons learned.
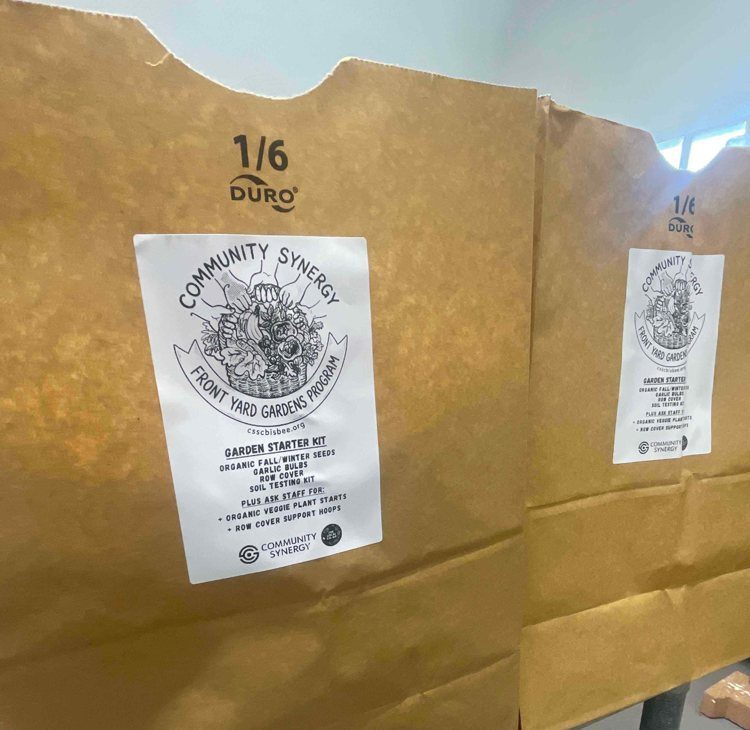
- Free 100 sq. ft. Garden Starter Kits: The first 25 participants to register will receive a complimentary garden kit valued at $70. This premium package includes:
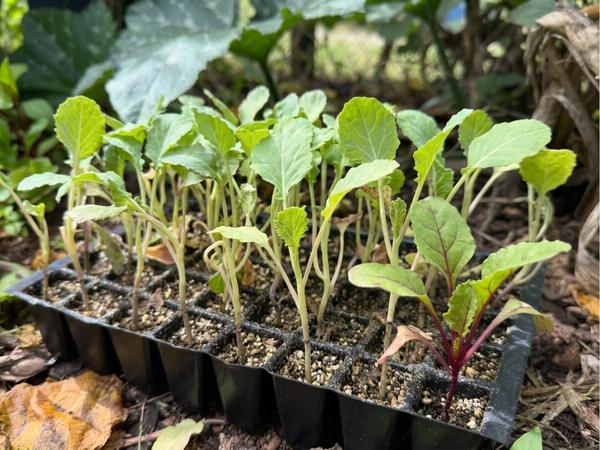
- 7 Live Organic Plant Starts: Green Magic Broccoli, Romanov & Supreme Vantage Cabbage, Lacerta Cauliflower, Sonora Celery, and Grazion & Salanova Red Butter Lettuce.
- 7 Organic Seed Packs: Pelleted Carrots, Pelleted Beets, Turnips, Radishes, Garlic, Kale, and Spinach.
- 1 Rapid Soil Test Kit: To check your soil health before planting.
- Frost Protection: An Agribon AG-19 Floating Row Cover (83" x 25') and heavy-duty DIY hoops to protect your crops from sudden freezes.
- Neighborhood Guilds: Meet and collaborate with other gardeners in your area who are also participants in the program. The goal is to team up, share labor, trade seasonal harvests, and swap gardening tips face-to-face.
- Free Irrigation Class: Learn best practices and materials for high-desert water management with a workshop designed to help you set up an efficient watering system.
- Monthly Volunteer Days: Hands-on community workdays to tackle big projects together.
Cochise County Cool-Season Garden Guide
October Newsletter Edition:
An Introduction to Place
Cochise County is part of the Madrean Archipelago, or Sky Islands, a highly biodiverse area where five different bioregions converge. Elevations within the Cochise County Sky Islands range from 2,920 ft., along the San Pedro River, to 9,759 ft. at Chihuahua Peak in the Chiricahua Mountain Range. With this diversity in elevation, the USDA Plant Hardiness Zones range from 6a to 9b, with most communities falling between zones 7b and 8b. Be sure you know what your exact elevation is, so that you can find your hardiness zone and look up the expected frost dates and appropriate plants for your garden.
Cool season gardening in the Sky Islands officially began in September, the perfect time to start cool weather crops from seed. Now that October has arrived, the intense daytime heat has mostly passed, the nights are cooling down, and our warm soil still holds enough warmth to get some seeds moving. It’s truly a magnificent time for a fresh start. However, the mountain microclimates here can be completely unforgiving as October shifts into November and the first freeze hits. In many locations, if you plant even a couple of weeks too late, the rapidly dropping soil temperatures and shrinking daylight hours can stall your crops at half-size. Balancing the rapid shift from hot to cold (and vice versa in spring) is the goal of every high desert gardener. Not to worry! By picking the best location and layout for your cool season garden, choosing appropriate varieties, and utilizing frost protection—you can still be right on time for a productive cool season garden. So grab your seeds and starters, prep your soil, and let's make this autumn growing season something to be truly proud of!
1Garden Planning, Layout, & Design Lessons 📐
Before putting seeds into the soil, use these design tips to set your cool season garden up for success.
- Sun, Wind, and Slope: A cool season garden should maximize the diminishing sunlight hours available. This means choosing a site that will not be shaded by a building or large trees to the south or east (and in many cases to the west as well). We want our cool season gardens to receive full sun. This is important—so get out your compass and find where south is. Make sure that there are no tall obstructions between your garden and the southward direction. You also want your soil to warm up as early as possible on those frosty mornings, so keeping the eastern horizon clear of obstructions is very important as well. Whenever possible, ensure your plot is completely level. Watering on a slope causes rapid runoff, preventing deep root soaking and causing uneven watering. Choose a spot that has wind shelter (hedges or shrubs) that will protect from prevailing winds. Typically, Cochise County’s prevailing winds are blowing in from the southwest in spring, with winter gusts coming from the northeast and northwest.
- Test Your Soil: Doing a little research on what type of soil your working with will go a long way. Most soils in Cochise County have a high (alkaline) pH, which is important to know because certain plants, like blueberries, need a low pH, (acidic) soil to flourish. If your garden is in the lower elevations along the river or wash, it might be very sandy, full of heavy clay, or restricted by caliche. If your gardening on a mountain slope, like many Old Bisbee gardeners, chances are you're dealing with mostly rock and little soil. Beyond the main soil texture, soils might be very high in certain minerals, like calcium (hard), or lacking in vital macronutrients, such as nitrogen, potassium, phosphorous, magnesium and iron. Luckily there are tools to learn about your soil.
1. Dig in there! Feel it with your hands, put some water on it. Does it have a crumbly light feeling, or is it sticky and slippery when wet? Can you even dig in at all? If it's very rocky, clay-based, or caliche, you will want to consider a different location or raised beds. If it's very gravely or sandy, you will want to add plenty of organic matter.
2. Perform an at home soil tilth test. Grab a mason jar, fill it halfway with a sample of the top 12" of topsoil in your garden plot and fill the other half with water. Put a lid on and shake it up, then let it settle for several hours. It will settle into distinct layers. The heaviest rocks and gravel will settle to the bottom. Then sand, then silt and clay on top. Organic matter will generally float on top or settle on the top layer. This will give you the percentages of soil type in your plot. The ideal garden soil composition—known as loam—consists of 40% sand, 40% silt, and 20% clay, supplemented by roughly 2% to 5% organic matter and about 50% pore space for air and water.
3. Pick up a home soil test kit. Included in the free garden kits, and available at most garden centers, a home soil test kit will give you an idea of what soil nutrients may be necessary for your garden to thrive.
4. Look up your USGS Soils Map. You can look up what's going on geologically under your garden by going to https://websoilsurvey.nrcs.usda.gov/app/ and getting a free soil map of your property. Once at the website, click the green START WSS button, put in your address or coordinates under the quick navigation heading and press view. Then press the rectangle AOI button above the map area and use it to draw a rectangle around your neighborhood or property. Then click the tab along the top that says SOIL MAP. This will take you to a link with the description of your soils. - Location & Proximity: Next, try to place your garden plot as close to your kitchen door, or daily path to the mailbox as possible. You are significantly more likely to tend, weed, and successfully use your garden if you are passing by it repeatedly each day. This is a meaningful point about the practicality of “the front yard garden”.
- Bed Dimensions & Orientation: Keep your raised beds or ground rows to a maximum width of 3 to 4 feet. This allows you to easily reach the center from either side without stepping on the soil and compacting it. If you can only access one side of your bed, keep it at 2' wide. Place your garden beds in an east to west orientation to maximize your southern exposure to all plants. Grade your plants by height within the bed: always position your tallest crops on the Northern side and your shortest crops on the Southern side, so they do not overshadow each other as the sun passes.
- Water Access & Tools: Position your beds close to a water source or rainwater storage. Hauling heavy buckets or coiling hundreds of yards of hose creates unnecessary labor. Keep your daily tools (pruners, hand trowels, border forks) right at the plot inside a bench with built-in storage. Whenever possible, install an irrigation system to make watering a breeze. This is especially helpful for germinating seeds.
2Preparing Your Garden Beds: Why Raised Beds Work 🛠️
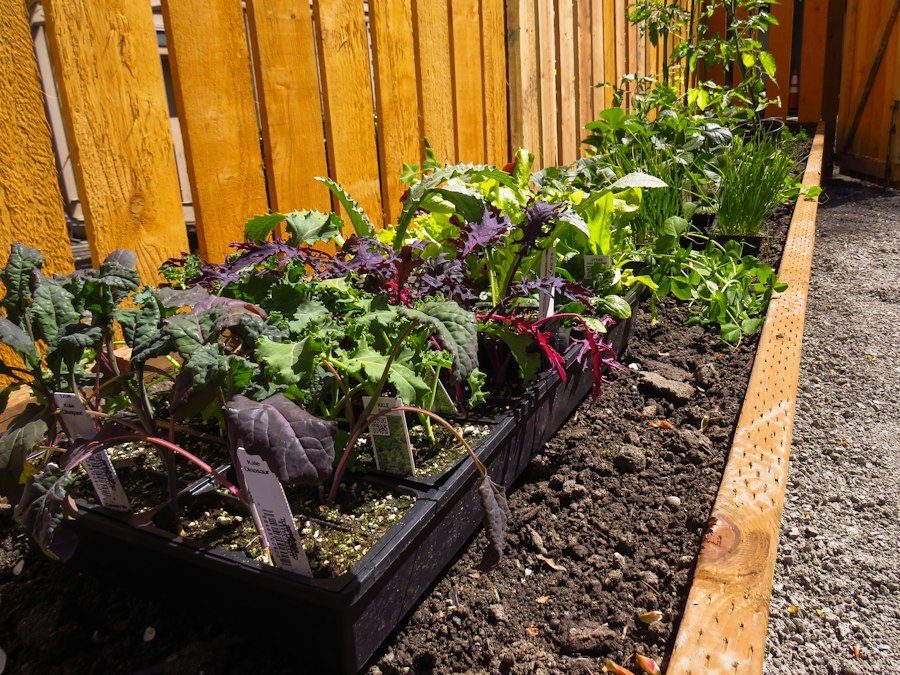
Once you have identified your garden site, the next step is preparing your planting beds. The right style for you depends on your soil quality, budget, materials, and physical mobility. This month, we are focusing on elevated raised beds as one bed style to consider for Cochise County gardens.
- Accessible Gardening: Elevated beds solve numerous mobility challenges. By putting the soil at waist height, they turn a painful chore into a relaxing hobby, allowing you to plant, weed, and harvest standing up or sitting in a chair with minimal bending. Beds fully suspended on legs offer open space underneath, allowing wheelchair users to roll right up and work comfortably.
- Bypassing Harsh High-Desert Soil: Many who have tried digging into native dirt in Cochise County know what is often waiting under the surface: rock, hard clay, and caliche that can stop a shovel cold. Elevated beds ensure your plants never have to touch this unforgiving ground.
- Total Soil and Weed Control: Filling the bed yourself means you control exactly what goes into it. A quality soil mix blended with compost gives roots loose, rich soil from day one—free of buried rocks, construction debris, or mystery chemicals. This clean environment gives you a fresh start with far fewer weed seeds, and any weeds that do appear are effortless to pull from the loose soil.
- Excellent Drainage: Built-in drainage holes at the bottom let excess water escape seamlessly. This ensures heavy monsoon rains won’t leave your plants sitting in a stagnant puddle.
- Fewer Pest Problems: Gophers, rabbits, and squirrels can wipe out a traditional ground garden overnight. An elevated bed lifts your crops safely out of reach, taking these common pests out of the equation.
- Maximizing Small & Neat Spaces: Elevated beds fit easily onto patio balconies, side yards, or small corners while producing far more food than you might expect. Because you never walk on the soil, it stays loose, meaning you can pack plants closer together than in traditional rows. Many gardeners divide their beds into one-foot squares to densely pack lettuce, carrots, onions, and herbs into a tiny footprint. You can even add a trellis along the back edge to grow vining crops like peas, cucumbers, and pole beans upward to turn unused vertical space into a larger harvest.
- Start With One: You don't have to build an entire garden overnight. Start with a single elevated bed, fill it with good soil, and see how much easier gardening can be. Once you see what a single bed can do, you may find yourself planning the next one!
- Links for Continued Learning:
3Preparing Your Soil: Feeding the Ground That Feeds You 🌱
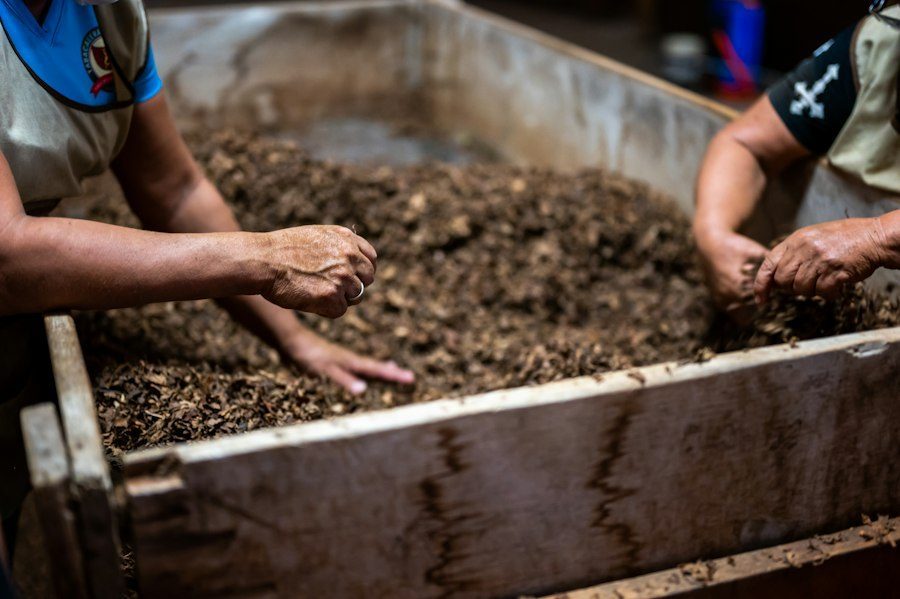
Whether you choose to plant directly in the ground, in pots, in straw bales, in Hügelkultur beds, in raised beds, in a hoop house, or in grow towers, the most important factor is the soil in the bed. For our gardens to grow strong, healthy plants that can feed us well, we must feed the soil well. Depending on your situation and available materials, there are a variety of options when it comes to feeding the soil—such as animal manure, compost tea, fish emulsion, bone meal, worm castings, bat guano, and a whole host of other bagged fertilizers and composts.
It can be tricky to know what is best to use. While some plants may need more or less of specific nutrients, the most practical, sustainable, and surefire way to safely feed our soil and plant roots is to add high-quality compost at the beginning of each planting season. Plants that grow in well-fed soil will not only be better producers, they will also possess the resilience to sustain through the stress of cold snaps, pest pressure, missed waterings, wind, and heat.
- High-Quality Compost ("Black Gold"): This is a dark, crumbly, and earthy-smelling organic material that is fully mature, free of weed seeds or debris, and chemically balanced to support healthy plant growth. It has a pH level between 6.0 and 8.0, a stabilized Carbon-to-Nitrogen (C:N) ratio, and contains roughly 30%–70% organic content by dry weight to help your soil retain moisture and build structure. Because these nutrients are held in an organic form, they are released slowly by soil microbes as they further decompose. This means it is gentle and will never burn tender seedlings when applied, allowing you to use it liberally. It supplies vital Nitrogen (N), Phosphorus (P), and Potassium (K), alongside Calcium (Ca), Magnesium (Mg), and other essential micronutrients. Look for organic compost at Ace Hardware, your local garden center, or better yet, make your own!
- How to Make Your Own Compost: High quality doesn't have to mean a high price. You can build a compost pile right on-site in a 3'x3'x3' area by layering 2 to 3 parts carbon-rich brown yard waste materials (like dry leaves, twigs, or paper) with 1 part nitrogen-rich green waste materials (like food scraps, animal manure, or grass clippings). Keep the pile moist like a wrung-out sponge and turned weekly to keep it oxygenated. Over time, beneficial microbes will quickly break down the materials, turning them into nutrient-rich compost. Making your own compost is a rewarding example of a closed-loop system that makes gardening affordable while reducing landfill waste.
4What to Plant in October: Deep Dive Crop Guide
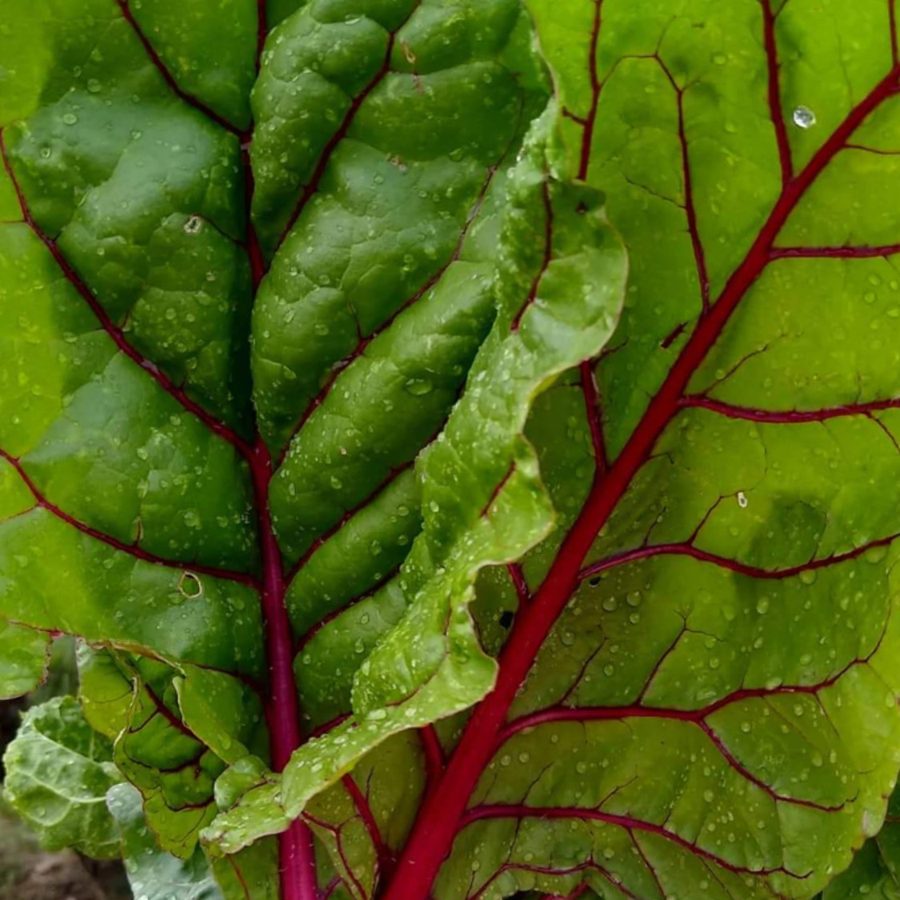
Leafy Greens: Chard, Spinach and Arugula are made for this season. All three handle frost well. Lettuce is a fast-growing crop that can be sown every two weeks through the cool season for a continued harvest but must be protected with a frost cloth (provided in starter kits) once nighttime temperatures begin to drop below 33 degrees—usually the first week of November.
- Varieties to Plant:
- Lettuce: Butterhead, Boston, Loose Leaf, Grazion, and Salanova Red Butter.
- Swiss Chard: Bright Lights, Fordhook Giant, and Rhubarb.
- Arugula: Astro, Rocket, and Italian Cress.
- Harvest & Care Tips: Leafy greens are heavy feeders that rely on rich, fluffy soil to establish strong root networks before the first frost, so be sure to not skip your garden bed preparation. Direct-sow leafy green seeds as soon as possible or transplant seedlings into prepared beds. Be sure not to plant your seeds too deep and do keep your soil evenly moist for germination. Begin harvesting the outer leaves as soon as the plants are a few inches tall. Leave the central growing point intact so the plant can produce continuous harvests for months. Lettuce requires minimal maintenance and grows well in containers, raised beds, or indoors.
- Pest Threats: Aphids are a major threat in Arizona and can easily stunt or kill kale, but this is not much of a problem in the cool season. Slugs will emerge in cool, wet weather or if greens are grown in damp shade. Birds, squirrels, rabbits, and deer will eagerly destroy unprotected leafy greens; use row netting to protect them.
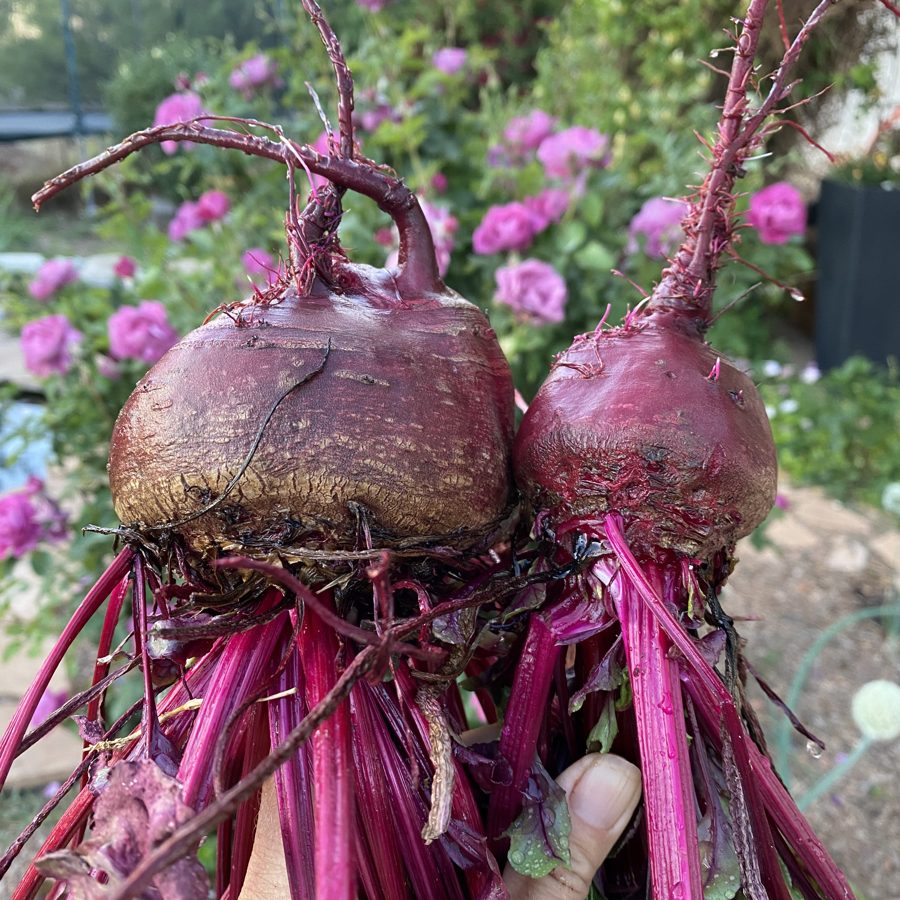
Root Crops: Carrots, beets, turnips, and radishes all do well in October’s cooler soil, but should be planted in full sun for cool season success. Radishes are the quick win of the fall garden. Many varieties are ready in about four weeks, which makes them a great crop for beginners and kids. Carrots take longer but reward your patience. Beets and turnips are dual purpose because their nutrient-dense greens are ready in weeks, while the roots can be harvested later. Root vegetables get sweeter with cooler temperatures as the starches are converted to sugars to protect the plant’s cells from freezing. The cool air also slows down the plants respiration, keeping the root flesh incredibly crisp and firm.
- Varieties to Plant:
- Radish: French Breakfast, Cherry Belle, Roxane. (Plant in succession every two weeks)
- Turnip: Hakurei, Tokyo Market.
- Beets: Early Wonder, Detroit Dark Red, Boro
- Carrots: Mokum, Napoli, Scarlet Nantes (Avoid long-season imperator types, that take a long time to mature)
- Harvest & Care Tips: Plant in full sun. Plant short season varieties. Root crops require loose, loamy, sandy, or small-particle soil to grow. Do not plant them in heavy clay soil, or root development will stop entirely. Do not over fertilize with nitrogen or you will not get root development. Use a low nitrogen, high potassium and phosphorous fertilizing plan. Always space seeds out carefully when planting; crowding radish or carrot seeds inhibits final root size and ruins flavor. Keep seedbeds evenly moist until they sprout (A wood board placed over the seeded row for the first 5 days and then removed is a great way to boost germination success in a dry climate), and be sure to thin seedlings early so roots grow completely straight. Once established, allow soil to dry out between waterings.
- Pest Threats: Gophers, rabbits, and squirrels will quickly feast on carrot and beet top leaves and roots if they are left uncovered; protect them with lightweight netting. Gophers can be disastrous to our root crops, but they don't like garlic, so interplant garlic with other root veggies to ward off the menace gopher.
Brassicas: Broccoli, kale, cabbage, bok choy, and cauliflower flourish during the cool winter climate, benefiting immensely from dropping nighttime temperatures. Like root vegetables, brassicas get even sweeter after a cold snap. Brassicas are longer season crops, so for best success in October, transplant seedlings into your prepared beds rather than sowing seeds.
- Varieties to Plant:
- Broccoli: Green Magic
- Cabbage: Supreme Vantage and Romanov
- Cauliflower: Lacerta
- Kale: Curly, Lacinato, Red Russian, and Ornamental
- Harvest & Care Tips: Brassicas are notorious “heavy feeders” that require high levels of nitrogen to fuel their rapid, massive leafy growth, and high potassium to build strong plant cell walls for winter carbohydrate storage. Animal manure and fish emulsion are good options for quick nitrogen application. They also have a specific need for sulfur to produce their natural oils and glucosinolates. Amending your soil with a small amount of gypsum provides sulfur without altering your soil’s PH. So, don’t skip the fall soil preparations. For cabbages, avoid over-fertilizing, as too much fertilizer causes the heads to become overly large, hard, and indelible. Harvest cabbage right at its peak texture--never let it get too hard or too soft. Cauliflower is notorious for being tricky and unforgiving; start seeds early to successfully overwinter them.
- Pest Threats: Cabbage white butterflies and cabbage loopers will heavily mangle brassica leaves and heads. Never grow brassicas without a very fine insect mesh or protective netting. Another option is to create cabbage white butterfly decoys out of paper. Cabbage white butterflies are territorial so if you place laminated paper decoys every three square feet in your brassica bed, any actual cabbage white butterflies in search of a feast will fly by to avoid a territory that is already colonized. Another trick is to companion plant with garlic and dill to deter brassica-loving pests.
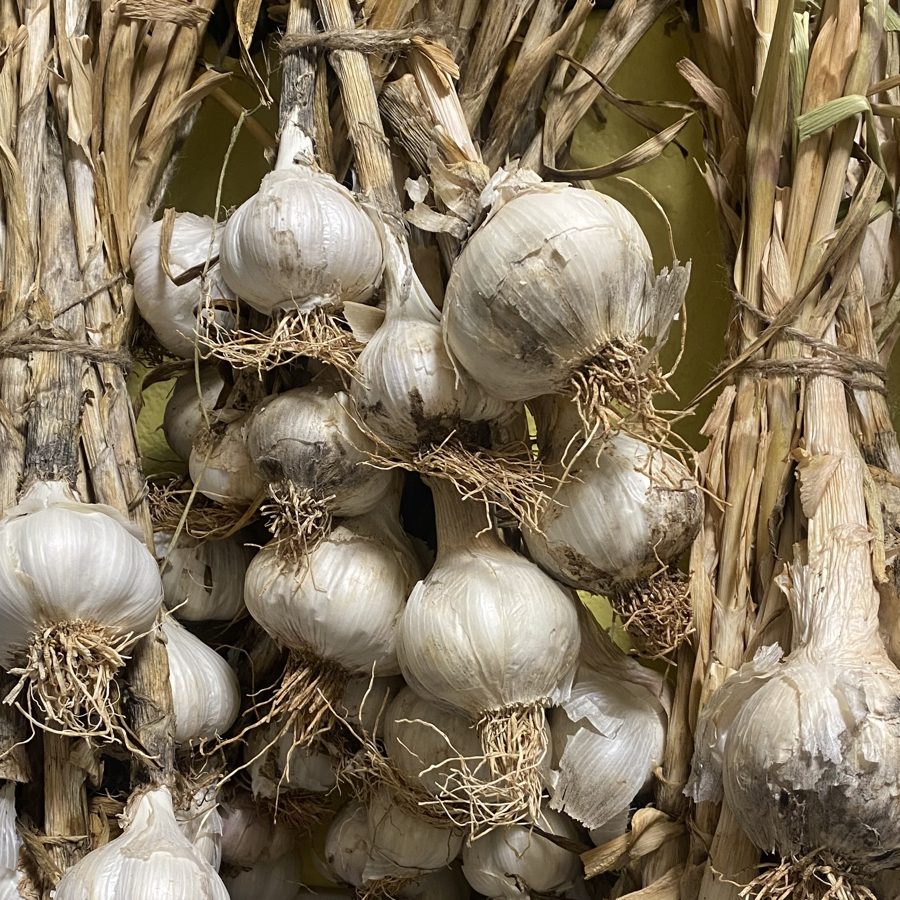
Alliums: Garlic & Onion Sets: October is the prime window to plant garlic cloves, onion sets and shallots pointed-end-up about 2- inches deep. In Cochise County, garlic is planted in October and harvested in May. Organic garlic from the grocery store can be planted as your seed. Garlic is virtually foolproof in temperate climates and easily stores for months after a summer harvest. For detailed directions on planing onions from seed, see section 6.
Other Cool Season Selections: Peas, Celery, and Rhubarb. Popular winter choices include Snow Peas, Sugar Snap, and English Peas. Peas thrive uniquely in cold winter weather; warmer spring temperatures instantly degrade their sweet flavor and growth. They require minimal horizontal space, making them perfect for vertical gardening systems or mixed raised beds. Watch for hungry birds and rodents in late winter.
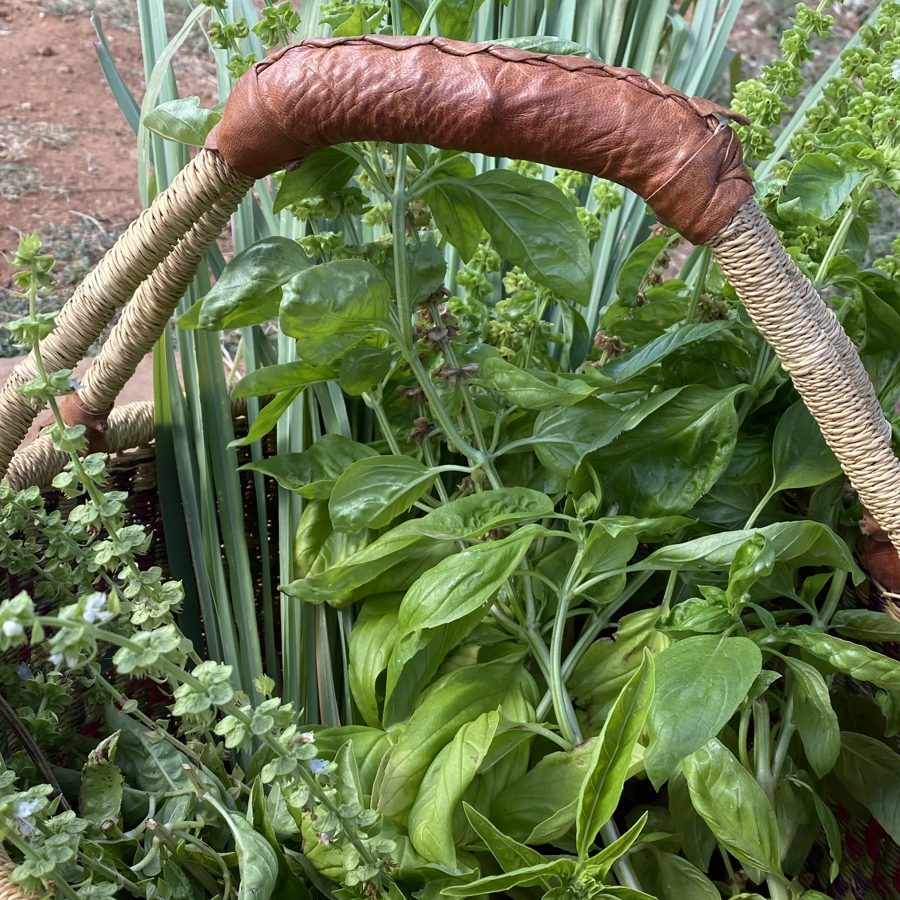
Herbs: There are a few herbs that grow exceptionally well in Cochise County’s cool season. Cilantro, parsley, dill, chives, garlic chives, oregano, thyme, and rosemary are some familiar choices.
- Planting Advice: Sow cilantro, parsley, dill, and chives in late summer into early October as day lengths shorten. This timing forces the plant to focus on lush, leafy green growth for recipes rather than premature flowering. Oregano, thyme and rosemary are better planted from starts in October. Keep herbs well-watered. For a late October start, consider transplants for all herbs for the highest success rates, and use frost cloth to protect leaves during heavy frosts.
- Harvesting Summer Herbs: As seasonal temperatures start to dip, it is vital to bring in the last of your summer herbs before an overnight frost claims them. Harvest any remaining sweet basil immediately and turn it into pesto to freeze, as basil is one of the first plants to die once the nights turn cold. For your other culinary herbs, like rosemary, sage, thyme, marjoram, parsley, and mint, cut healthy stems and hang them to dry, or use a dehydrator so you stay fully stocked through the winter months.
- Perennial Seed Saving & Cold Stratification: Take time to save your seeds this month! Echinacea seed heads are ready now, along with other popular perennial herbs like yarrow, milkweed, perilla, evening primrose, sage, chamomile, arnica, bee balm, and mullein. Because these specific herbs benefit immensely from cold stratification, store the clean seeds inside a sealed, labeled envelope or glass jar directly in your freezer over the winter. This mimics their natural outdoor chill cycle, ensuring high germination success when spring planting arrives.
Winter Flowers & Native Plants: Fall is the single best window to transplant hardy winter annuals and native species. Transplanting now allows roots to establish without summer heat stress. These plants handle temperature swings and provide immediate habitat for local pollinators, birds, and wildlife. You can also direct sow annual flowers.
- Hardy Annual Flowers: Direct sow into borders or along walkways or transplant them into containers or walkways for bright winter colors: Pansies, Violas, Snapdragons, Calendula, Petunias, Bells of Ireland, Sweet William/Dianthus, Feverfew, Nigella, Bachelor Buttons, Bee Balm, Larkspur, Lisianthus, Scabiosa, Island Poppy, Strawflower, Yarrow, Ranunculus. Dianthus tolerate cold high-desert nights easily.
- Native Plants: These native choices are perfectly adapted to regional rainfall: Penstemon, Desert Marigold, and Globemallow, Columbine, Bee Balm, Yarrow, and Delphinium.
5October Garden Tasks & Multi-Week Calendar
A small amount of targeted maintenance this month yields heavy production all winter. Follow this week-by-week calendar:
Bed Cleanup & Soil Prep
Pull down spent, exhausted summer crops, saving seeds as you go. Compost anything that is completely disease-free (exporting organic carbon and nutrients from your yard forces you to buy soil later; instead, mix your homemade compost 50/50 with potting soil to save money). Clear out all weeds. Work 2–3 inches of fresh organic compost or aged manure into your beds to rebuild soil structure. Check your drip irrigation lines and emitters thoroughly before planting.
Sowing & Cold Starts
Direct-sow your seeds for leafy greens, root crops and peas. Set out your starter transplants for brassicas celery, and rhubarb. Collect and store dried seeds from your favorite summer plants and herbs. Keep soil moist—this means watering thoroughly once or twice daily while seeds germinate.
Alliums, Perennials, & Hot Compost
Plant garlic cloves, leeks, shallots, and onion sets. Start a hot compost pile: ensure it is at least 3ft x 3ft x 3ft, use a ratio of 3 parts carbon "browns" to 1 part nitrogen "greens," keep it damp like a wrung-out sponge, and turn it weekly.
Freeze Preparation
Have your seasonal frost cloth and support hoops ready to deploy as nighttime temperatures plummet toward the late October frost window. Pick every remaining warm-season tomato, pepper, summer squash, and tender herbs like basil. Preserve your harvest by drying, canning, and freezing. Cut back potted peppers and move them indoors to overwinter. Bring sensitive houseplants inside. Apply a thick layer of organic mulch across beds to trap moisture and buffer soil temperatures.
Systematically cut back on your watering timers as temperatures drop. Keep irrigation deep, long, and slow to reach deep root zones, but space the days out further to prevent root rot. Watch daily for aphids or cabbage loopers on your brassicas. Pull summer monsoon weeds completely before they drop seed.
6October Planting Deep Dive How-To: Onions From Seed 🧅
Starting onions from seed offers access to unique varieties at a fraction of the cost of transplants. Onions do not bulb based on size or age; they bulb strictly based on day length. You must choose short-day or intermediate-day varieties for Southeast Arizona. Short-day onions bulb at 10–12 hours of light, and intermediate types bulb at 12–14 hours. Long-day types will never form bulbs in our southern latitude. Always buy fresh onion seed yearly, as it loses viability rapidly.
- Setup Trays: Select a cell tray or open flat with functional bottom drainage holes. Wash it thoroughly if it has been used previously.
- Soil Preparation: Fill trays with a light seed-starting mix. Water until evenly damp, never soggy, and level the mix just beneath the rim.
- Sow Seeds: Drop exactly one fresh onion seed per cell.
- Cover and Press: Top with a light ¼-inch layer of seed mix. Press down gently to guarantee firm seed-to-soil contact.
- Mist Intensely: Water using only the fine mist setting on a hose nozzle to keep seeds from dislodging. Maintain constant moisture.
- Sun Exposure: Sprouts emerge in 1 to 2 weeks. Move trays into immediate full sun the moment sprouts appear so they grow stocky and strong rather than thin, leggy, and weak.
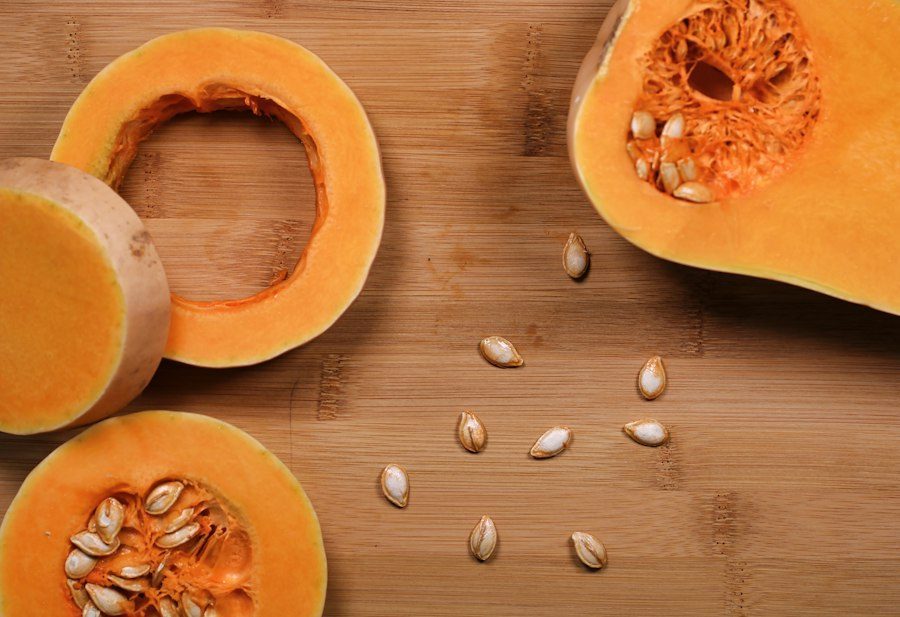
7Seasonal Recipe: Butternut Squash Chai Smoothie 🥤
Makes 2 servings — A delicious way to enjoy autumn harvests!
Ingredients
- 1 cup cooked butternut squash
- 2 cups milk of choice
- 1 cup strong-brewed black tea, chilled (or water/ice, steeped with 1–2 tea bags)
- 3 tbsp nut butter of choice
- ½ tsp ground cinnamon
- ¼ tsp ground cardamom
- ⅛ tsp ground cloves
- ½ tsp fresh grated ginger
- Pinch of black pepper
Instructions
- Brew a strong black tea, then chill it completely or pour it directly over ice.
- Add the chilled tea, milk, cooked butternut squash, nut butter, and spices into a blender.
- Blend on high for 45–60 seconds until completely smooth. Serve cold!
8Community Corner 🏡
Our shared space for member voices, reflections, and journeys.
Beginning a Garden
By T. (Bisbee Resident)
For the first time in my life, I've decided to start gardening. I'm in my 50s, and my reasons have to do primarily with wanting to attain as-good-as-possible health as I age.
What recently pushed me even more to begin gardening is the concern about access to healthy groceries.
If I grow them myself, I don't have to worry about how they were handled and grown, and I can be supported in my shift from larger to local. I'm impressed with all that Community Synergy's Front Yard Garden Program offers, and its ability to give us access to different resources—which is a beautiful thing!
I'm ready for this new commitment to maintaining a small garden for myself, and embracing change in order to bring this new healthy hobby and lifestyle choice into my life.
9Winter Weather Watch: Super El Niño
El Niño happens when waters in the tropical Pacific Ocean run warmer than normal. Those warm waters shift weather patterns around the world, including the path of the jet stream that steers winter storms across the United States.
As of September, NOAA's Climate Prediction Center gives this year's El Niño a greater than 90 percent chance of being a very strong event through fall and winter. They also give it a 75 percent chance of becoming the strongest El Niño on record since 1950.
- Rain: During El Niño winters, the jet stream tends to dip south and bring more storms across the southern United States, including Arizona. Forecasters favor a wetter-than-normal winter for our area.
- Temperature: NOAA's latest outlook gives the Southwest equal chances of an above-normal, near-normal, or below-normal winter. That leaves two main possibilities:
- A milder winter. Cloud cover from passing storms can hold in warmth overnight and keep temperatures above normal.
- A colder winter. The same storms can bring cold air and freezing nights, pushing temperatures below normal.
Stay tuned as we monitor the weather.
Conclusion: Growing Together 🌱
Whether you are starting your first seed tray on a windowsill or managing a series of mature raised beds, your presence in this program strengthens our entire community. Gardening in the high desert is a unique craft, but with the right timing and shared knowledge, your autumn efforts will reward you with a spectacular winter harvest. Keep this guide handy as you step out into your beds this week, look out for your neighboring guild members, and let's work together to create spaces we can all deeply admire and celebrate. Happy growing!